Unleash creativity with the 6-in-1 Solar Robot Kit‚ a DIY educational experience! This versatile set empowers builders to explore solar energy and robotics‚ offering six unique models․
What is the 6-in-1 Solar Robot Kit?
The 6-in-1 Solar Robot Kit is an engaging‚ hands-on educational toy designed to introduce children and hobbyists to the principles of solar power and robotics․ It’s a DIY (Do-It-Yourself) construction set containing components that can be assembled into six distinct robot models: a windmill‚ a robot bug‚ a wheeler (car)‚ an airboat‚ a helicopter‚ and a plane․
Each model utilizes a solar panel to convert sunlight into electrical energy‚ powering a motor and gearbox to create movement․ The kit isn’t just about building; it’s about learning how renewable energy sources can be harnessed to power machines․ Finding the instructions PDF is crucial for successful assembly‚ allowing users to navigate the building process for each unique creation․
Target Age and Skill Level
The Merlin 6-in-1 Solar Robot Kit is generally recommended for children aged 8 and up‚ though younger builders with assistance can also enjoy the experience․ The assembly process requires a degree of fine motor skills and problem-solving ability‚ making it suitable for those developing these competencies․ While no prior robotics experience is necessary‚ a basic understanding of how things fit together is helpful․
Accessing the instructions PDF is vital‚ as it provides step-by-step guidance for each model․ The complexity increases with each build‚ offering a progressive learning curve․ Successfully completing all six models demonstrates a good grasp of mechanical principles and solar energy concepts․ It’s a fantastic project for budding engineers and science enthusiasts!
Educational Benefits of Solar Robot Kits
The 6-in-1 Solar Robot Kit delivers substantial educational value‚ fostering STEM (Science‚ Technology‚ Engineering‚ and Mathematics) skills․ Children learn about renewable energy sources‚ specifically solar power‚ and how it can be converted into mechanical motion․ The hands-on assembly process enhances problem-solving abilities‚ critical thinking‚ and spatial reasoning․
Following the instructions PDF encourages careful reading and attention to detail․ Building multiple models promotes creativity and adaptability‚ as builders modify designs or troubleshoot issues․ This kit isn’t just about building robots; it’s about understanding the underlying principles of engineering and sustainable energy‚ preparing young minds for future innovation․
Kit Contents and Components
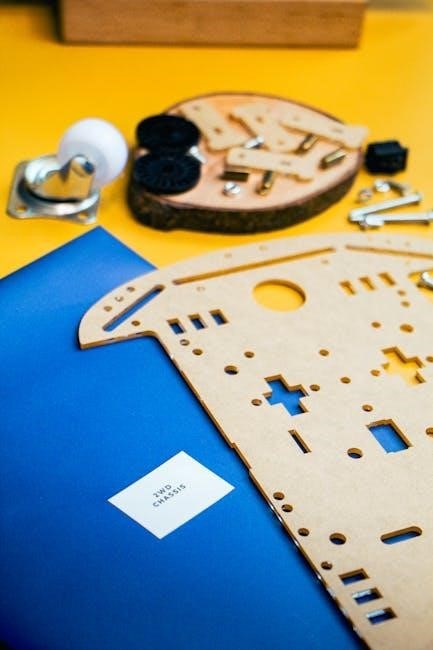
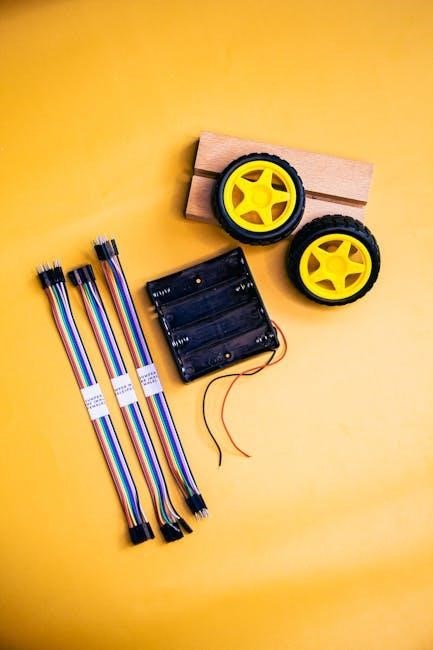
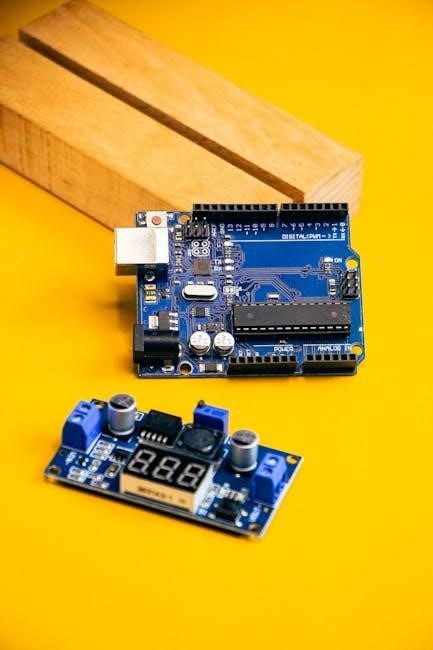
The 6-in-1 Solar Robot Kit includes all necessary parts for six models: a solar panel‚ motor‚ gearbox‚ wheels‚ and connecting pieces for assembly․
List of Included Parts
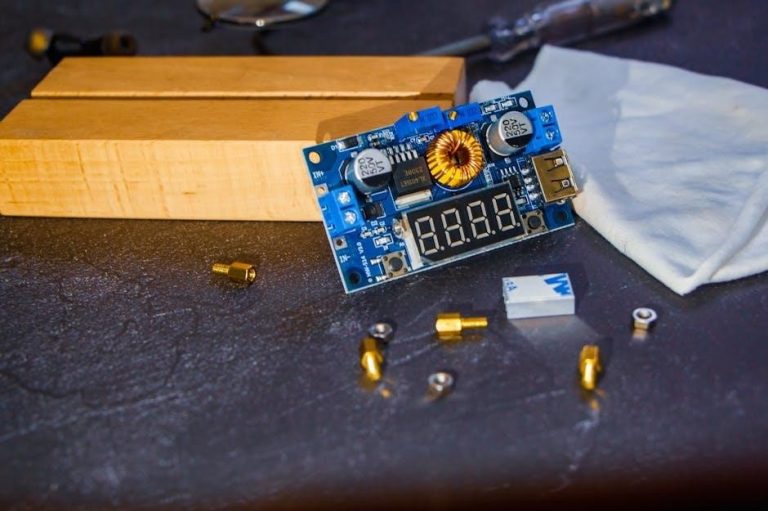
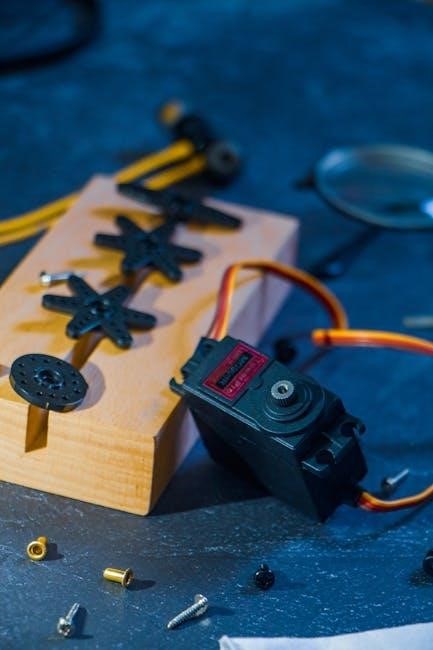
The Merlin 6-in-1 Solar Robot Kit boasts a comprehensive collection of components designed for diverse builds․ Expect one solar panel to harness the sun’s energy‚ a crucial element powering all six robot creations․ A core motor and accompanying gearbox are included‚ translating solar power into mechanical movement․
You’ll find a variety of connecting pieces – gears‚ shafts‚ and brackets – facilitating the construction of each unique model․ Multiple wheels are provided‚ enabling the creation of rolling robots like the Wheeler․ Additional parts specific to each robot‚ such as windmill blades‚ helicopter rotors‚ and plane wings‚ complete the set․ Carefully unpack and inventory all components before beginning assembly‚ referencing the included instructions or a downloaded PDF manual (OWI-MSK610) to ensure everything is present․
Identifying the Solar Panel
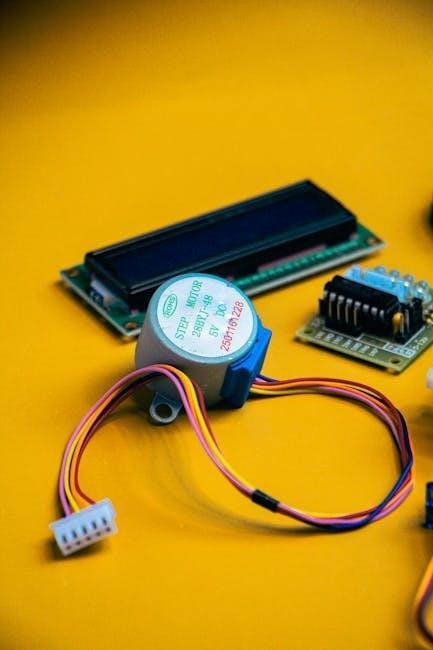
The solar panel is the heart of the 6-in-1 Robot Kit‚ converting sunlight into electrical energy․ It’s typically a small‚ rectangular component with a dark‚ often blueish‚ surface․ Locate the panel – it’s essential for powering all six robot models․
Carefully examine the panel for pre-attached wires; these are crucial for connecting to the motor and gearbox․ The PDF instructions (OWI-MSK610) will clearly illustrate the correct wiring configuration․ Note the polarity of the wires – typically red for positive and black for negative – ensuring correct connection is vital for functionality․ Avoid bending or damaging the panel’s surface‚ as this can reduce its efficiency․ Proper identification and careful handling of the solar panel are key to a successful build and a fully functional solar-powered robot․
Understanding the Motor and Gearbox
The motor and gearbox work in tandem to translate electrical energy from the solar panel into mechanical motion․ The motor itself is a small cylindrical component‚ while the gearbox reduces the motor’s speed and increases its torque – essential for powering the robot’s movements․
Refer to the PDF instructions (OWI-MSK610) for detailed diagrams showing how the motor and gearbox connect․ Pay close attention to the gear alignment; incorrect assembly can hinder performance․ The gearbox often features multiple gears – ensure they mesh smoothly․ The solar module drives the motor within the gearbox‚ creating the power for each robot model․ Understanding this core mechanism‚ as detailed in the manual‚ is crucial for successful assembly and operation․
Recognizing the Connecting Pieces
The 6-in-1 Solar Robot Kit includes a variety of connecting pieces – rods‚ plates‚ and connectors – essential for building the six different models․ These pieces‚ detailed in the PDF instructions (OWI-MSK610)‚ allow for flexible construction and adaptation between robot designs․ Carefully identify each component before beginning assembly; the manual provides clear illustrations․
Pay attention to the different lengths and shapes of the rods and plates․ Connectors often have specific orientations‚ as shown in the diagrams․ Proper connection is vital for structural integrity and smooth operation․ The PDF will guide you through which pieces are needed for each model․ Mastering the use of these connecting elements‚ as outlined in the manual‚ is key to bringing your solar-powered creations to life․
Robot Models: Overview
Explore six exciting robot builds: windmill‚ bug‚ car‚ airboat‚ helicopter‚ and plane! The PDF instructions (OWI-MSK610) detail each model’s unique assembly process․
Solar Windmill Construction
Embark on building the Solar Windmill‚ a captivating introduction to renewable energy! The 6-in-1 Solar Robot Kit PDF instructions (specifically for the OWI-MSK610 model) provide a step-by-step guide․ Begin by attaching the base to the solar panel‚ ensuring secure alignment․ Next‚ connect the gearbox and motor assembly to the windmill blades․
Carefully follow the diagram to position the blades correctly for optimal rotation․ The PDF will illustrate how to secure all components using the provided connecting pieces․ Once assembled‚ expose the windmill to direct sunlight; the solar panel will power the motor‚ causing the blades to spin‚ demonstrating solar energy conversion․ This model beautifully illustrates how sunlight can be transformed into mechanical energy‚ offering a hands-on learning experience․
Robot Bug Assembly
Construct the fascinating Robot Bug‚ a dynamic model within the 6-in-1 Solar Robot Kit! Refer to the OWI-MSK610 PDF instructions for detailed guidance․ Start by attaching the bug’s body to the solar panel‚ ensuring a stable connection․ Then‚ carefully mount the gearbox and motor‚ aligning them precisely with the leg mechanisms․
The PDF diagrams will clearly show how to connect the legs using the provided parts‚ enabling the bug to “walk” or vibrate when powered by sunlight․ Pay close attention to the polarity of the solar panel connection․ Once assembled‚ place the Robot Bug in direct sunlight; the solar energy will activate the motor‚ bringing it to life! This model provides a fun and engaging way to learn about simple circuits and locomotion․
Wheeler (Car) Building Instructions
Assemble the speedy Wheeler‚ or car‚ using the 6-in-1 Solar Robot Kit components! The OWI-MSK610 PDF instructions are your guide․ Begin by attaching the chassis to the solar panel‚ ensuring secure placement․ Next‚ connect the gearbox and motor‚ aligning them to drive the wheels․ The PDF diagrams illustrate the precise positioning of each part for optimal performance․
Carefully attach the wheels to the axles‚ ensuring they rotate freely․ Double-check all connections before exposing the Wheeler to sunlight․ When powered‚ the solar energy will drive the motor‚ propelling the car forward․ This model demonstrates basic principles of mechanical power and solar energy conversion․ Refer to the PDF for troubleshooting tips if the Wheeler doesn’t move․
Airboat Model Guide
Construct the unique Airboat using the 6-in-1 Solar Robot Kit‚ guided by the detailed OWI-MSK610 PDF instructions․ Begin by assembling the boat’s hull‚ ensuring a watertight seal․ Attach the solar panel securely to the hull‚ providing the power source․ Next‚ connect the gearbox and propeller‚ aligning them for efficient thrust․ The PDF diagrams clearly illustrate the correct component placement․
Carefully mount the propeller onto the motor shaft‚ ensuring it spins freely․ When exposed to sunlight‚ the solar panel powers the motor‚ rotating the propeller and propelling the airboat across a smooth surface․ This model showcases principles of propulsion and solar energy application․ Consult the PDF for assistance if the airboat doesn’t glide smoothly․
Helicopter Assembly Steps
Build the Solar Helicopter with precision‚ referencing the OWI-MSK610 PDF instructions for a smooth assembly․ Start by constructing the helicopter’s frame‚ ensuring all connecting pieces are firmly attached․ Securely mount the solar panel atop the frame‚ positioning it to maximize sunlight capture․ Connect the gearbox and rotor blades‚ aligning them according to the PDF diagrams․
Attach the rotor blades to the gearbox‚ verifying they rotate freely without obstruction․ When sunlight hits the solar panel‚ it powers the motor‚ spinning the rotor blades and generating lift․ This model demonstrates principles of aerodynamics and solar power․ If the helicopter doesn’t achieve lift‚ review the PDF for troubleshooting tips and ensure proper component alignment․
Solar Plane Construction
Assemble the Solar Plane by carefully following the detailed diagrams within the OWI-MSK610 PDF instructions․ Begin with the fuselage‚ connecting the main body components securely; Attach the wings‚ ensuring they are aligned symmetrically for balanced flight․ Mount the solar panel onto the plane’s upper surface‚ optimizing its angle for maximum solar energy absorption․
Connect the gearbox and propeller‚ verifying a snug fit and free rotation․ Sunlight energizes the solar panel‚ powering the motor and spinning the propeller‚ propelling the plane forward․ Refer to the PDF for precise component placement and troubleshooting guidance if the plane doesn’t move․ This model illustrates basic aerodynamic principles and renewable energy utilization․
Assembly Instructions: General Tips
Download the OWI-MSK610 PDF instructions for clear diagrams and step-by-step guidance․ Patience and careful component alignment are key to successful builds!
Tools Required for Assembly
Fortunately‚ the 6-in-1 Solar Robot Kit is designed for minimal tool requirements‚ emphasizing accessibility for young builders․ Generally‚ no specialized tools are absolutely necessary for assembly; however‚ possessing a few simple items can significantly enhance the building experience and precision․ A small Phillips-head screwdriver is highly recommended for tightening screws securely‚ ensuring robust connections between components․
While not essential‚ wire cutters can be useful for neatly trimming any excess wire length if modifications are desired․ Additionally‚ a pair of pliers might prove helpful for gently manipulating smaller parts into place․ The downloadable PDF instructions (OWI-MSK610) don’t explicitly list tools‚ implying the kit is intended for largely tool-free construction‚ but these additions can aid in a smoother‚ more refined build process․ Remember to always exercise caution when using any tools‚ and adult supervision is advised‚ especially for younger children․
Reading the Assembly Diagrams
The PDF instructions for the 6-in-1 Solar Robot Kit (OWI-MSK610) rely heavily on visual assembly diagrams․ These diagrams are crucial for successful construction‚ depicting each step with clear illustrations of component placement and connections․ Pay close attention to the orientation of parts‚ as even a slight misalignment can hinder functionality․ The diagrams often use exploded views‚ showcasing how pieces fit together in a three-dimensional manner․

Carefully examine the diagrams before beginning each step‚ identifying all required parts and their corresponding labels․ Note the use of arrows to indicate direction and connection points․ The PDF may include multiple diagrams per step‚ detailing different angles or close-ups․ Understanding these visual cues is paramount; take your time and cross-reference the parts list to ensure accuracy throughout the building process․ A methodical approach to diagram interpretation will yield the best results․
Ensuring Correct Polarity of the Solar Panel
The 6-in-1 Solar Robot Kit’s functionality hinges on the correct polarity connection of the solar panel․ The PDF instructions will illustrate which wire from the solar panel connects to the positive (+) and negative (-) terminals on the gearbox․ Incorrect polarity will prevent the motor from running‚ or potentially damage it․ Typically‚ red wires indicate positive polarity‚ while black signifies negative‚ but always confirm with the diagram․
Double-check these connections before applying solar power․ A reversed connection won’t necessarily cause immediate visible damage‚ but it will impede operation․ If the robot doesn’t function‚ the first step in troubleshooting should be verifying the solar panel’s polarity․ Refer closely to the PDF’s wiring diagrams to guarantee a secure and correctly polarized connection for optimal performance․
Troubleshooting Common Assembly Issues
The 6-in-1 Solar Robot Kit PDF instructions often include a troubleshooting section‚ but here are some common issues․ If a robot doesn’t move‚ first check the solar panel connection and polarity – ensure it’s receiving direct sunlight․ Verify all wires are securely connected to the gearbox and components․ Loose connections are frequent culprits․ Examine the gears for proper alignment and any obstructions preventing smooth rotation․
If the robot moves slowly‚ insufficient sunlight is likely the cause․ Try a brighter location․ The PDF may detail specific component arrangements; double-check these against your build․ If a part seems missing‚ carefully re-examine the packaging and diagrams․ Don’t force any connections; refer to the instructions for proper assembly techniques․
Finding the PDF Instructions
Locate the 6-in-1 Solar Robot Kit PDF instructions online through the official OWI website or various third-party resources for easy assembly!
Official OWI Website for Downloads
The primary and most reliable source for the 6-in-1 Solar Robot Kit (model OWI-MSK610) PDF instructions is the official OWI Incorporated website․ Navigating to their site allows direct access to the downloadable manual‚ ensuring you have the most up-to-date and accurate assembly guide․
Typically‚ you can find the instructions within the “Support” or “Downloads” section of the website․ Search specifically for “OWI-MSK610” or “6 in 1 Educational Solar Kit” to filter the results․ OWI provides this resource free of charge‚ designed for private use only; redistribution is prohibited due to copyright restrictions․ Be aware that downloadable products generally come with a no-refund policy‚ so verify the file before downloading․ Accessing the PDF directly from OWI guarantees authenticity and avoids potential issues with modified or incomplete versions found elsewhere․
Third-Party Websites Offering the PDF
While the official OWI website is preferred‚ several third-party websites host the 6-in-1 Solar Robot Kit (OWI-MSK610) PDF instructions․ These include manual sharing platforms and online repositories dedicated to toy and gadget guides․ However‚ exercise caution when downloading from these sources‚ as file integrity and safety cannot always be guaranteed․
Always scan downloaded files with antivirus software before opening them․ Be mindful of potential malware or altered instructions․ Some sites may offer incomplete or outdated versions․ Searching for “OWI-MSK610 instructions PDF” on general search engines will reveal these alternative sources‚ but prioritize verifying the file’s authenticity․ Remember that OWI’s copyright protects the manual‚ and unauthorized distribution is illegal․ Use these sites at your own risk‚ and always cross-reference with the official guide if possible․
Searching for “OWI-MSK610 Instructions PDF”
A straightforward approach to locating the 6-in-1 Solar Robot Kit instructions is utilizing search engines with the precise query: “OWI-MSK610 Instructions PDF”․ This search string directly targets the model number and desired file format‚ increasing the likelihood of relevant results․ Be prepared to navigate through various websites‚ including official retailers‚ hobbyist forums‚ and document-sharing platforms․
Refine your search by adding terms like “download” or “manual” to further filter results․ Carefully evaluate each link before clicking‚ prioritizing official-looking websites or those with positive user reviews․ Beware of suspicious sites offering downloads that require registration or seem unusually cluttered with advertisements․ Remember to scan any downloaded PDF file with antivirus software to ensure its safety and integrity before opening it․
Potential Issues with Downloaded PDFs
When sourcing the OWI-MSK610 instructions PDF from various online locations‚ several potential issues may arise․ Downloaded files could be incomplete‚ corrupted during transfer‚ or contain outdated information‚ leading to assembly difficulties․ Some PDFs might be low-resolution scans‚ making diagrams and text difficult to decipher․ Furthermore‚ unauthorized copies may lack crucial pages or contain errors introduced during reproduction․
Always verify the source’s credibility and scan downloaded files with updated antivirus software to protect against malware․ If a PDF appears suspicious or doesn’t open correctly‚ attempt downloading from an alternative‚ reputable source․ Be cautious of files requiring excessive permissions or prompting unusual actions․ Consider comparing the downloaded instructions with online images or videos to confirm accuracy and completeness․
Solar Power and Functionality
Harnessing sunlight‚ the solar panel converts light into electricity‚ powering the gearbox and motor‚ bringing these six robot models to life effortlessly!
How the Solar Panel Powers the Robots
The 6-in-1 Solar Robot Kit’s functionality hinges on the solar panel’s ability to convert light energy directly into electrical energy․ This process‚ known as the photovoltaic effect‚ generates a direct current (DC) electricity when photons from sunlight strike the solar panel’s semiconductor material․
This generated electricity then flows to the included motor‚ housed within a gearbox․ The gearbox is crucial as it modifies the motor’s speed and torque‚ providing the necessary power to drive the various robot models – windmill blades‚ wheels‚ propellers‚ and more․
Essentially‚ the solar panel acts as a miniature power plant‚ eliminating the need for batteries in many cases‚ and demonstrating a practical application of renewable energy; The strength of the sunlight directly impacts the speed and performance of the robots․
Optimizing Solar Exposure for Performance
To maximize the performance of your 6-in-1 Solar Robot Kit creations‚ understanding solar exposure is key․ Direct sunlight provides the most efficient energy conversion‚ resulting in faster speeds and stronger operation of the robots․ Avoid shaded areas‚ as even partial obstruction significantly reduces power output․
Experiment with the angle of the solar panel relative to the sun․ Adjusting the panel to be perpendicular to the sun’s rays ensures the greatest amount of light is captured․ Cloudy days will naturally reduce performance‚ but the robots can still function‚ albeit at a slower pace․
Remember‚ consistent and strong light is vital․ Indoor use with bright lamps can work‚ but typically won’t match the power of natural sunlight․ Regularly cleaning the solar panel will also help maintain optimal efficiency․
Understanding Direct vs․ Indirect Sunlight
The 6-in-1 Solar Robot Kit’s functionality hinges on light energy‚ but the type of sunlight matters significantly․ Direct sunlight‚ unimpeded by clouds or obstructions‚ delivers the highest intensity and is ideal for peak performance․ This results in quicker movement and more robust operation of your assembled robots․
Indirect sunlight‚ filtered through clouds or reflected off surfaces‚ provides less energy․ While the robots will still function‚ expect reduced speed and power․ The difference can be substantial – a cloudy day might yield only a fraction of the performance seen in full sun․
Consider this when choosing a location for operation․ Even partial shade can dramatically impact the robot’s ability to run effectively․ Experimenting with different light conditions will help you understand how your creations respond․
Battery Considerations (if applicable)
While the core principle of the 6-in-1 Solar Robot Kit revolves around direct solar power‚ some models or variations might incorporate a small rechargeable battery․ This battery isn’t typically for continuous operation‚ but rather as a supplemental energy source or for brief functionality in low-light conditions․
If your kit includes a battery‚ understand its limitations․ It’s usually a low-capacity cell‚ intended to store a small amount of energy harvested from the solar panel․ Don’t expect extended runtimes without sufficient sunlight to recharge it․
Refer to the PDF instructions for specific details regarding battery charging and usage․ Improper handling could reduce its lifespan or affect performance․ Always prioritize solar power as the primary energy source for optimal operation․